Appearance
Managing Hardware Assets
The Assets section is the core of Snipe-IT. Here you can track all physical hardware in your organization — laptops, desktops, monitors, phones, servers, and any other equipment that needs to be inventoried.
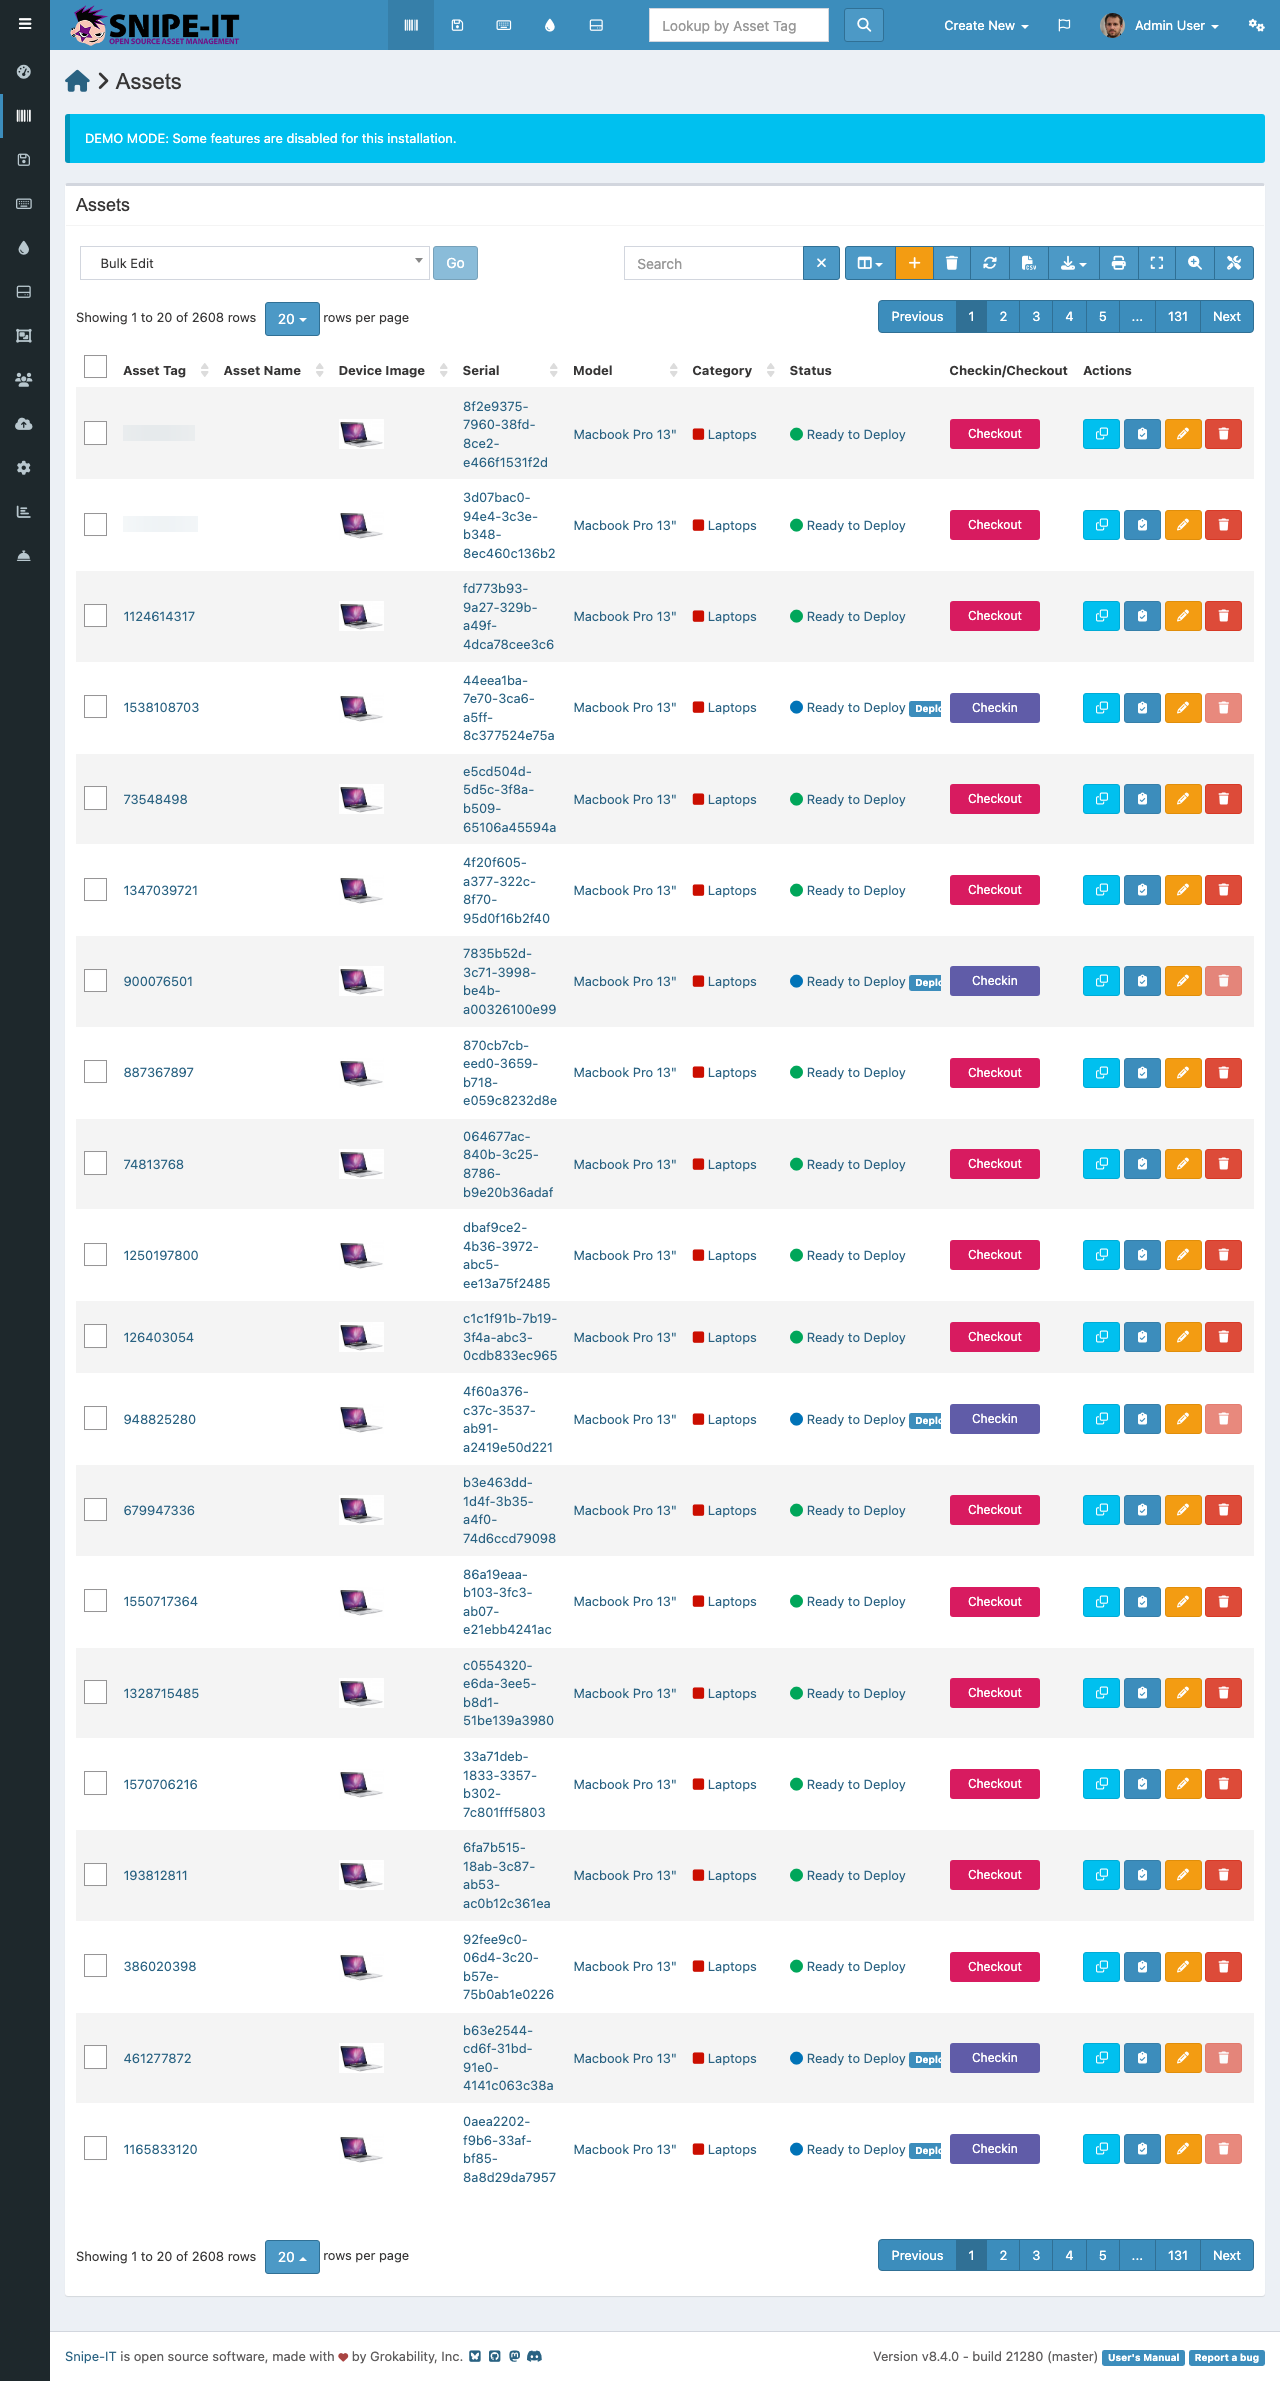
Viewing the Asset List
The main assets page displays a sortable, searchable table of all hardware in your inventory. Each row shows:
- Asset Tag — A unique identifier for the item
- Asset Name — The descriptive name
- Model — The hardware model (e.g., "MacBook Pro 16-inch")
- Serial Number — The manufacturer's serial number
- Status — Whether the asset is Ready to Deploy, Deployed, Archived, or another custom status
- Assigned To — The person or location currently responsible for the asset
- Location — Where the asset is physically located
Searching and Filtering
Use the Search bar [2] at the top of the page to find specific assets by tag, name, serial number, or any other field. You can also click column headers to sort the table by that field.
The status label filter at the top lets you narrow the list to specific statuses (e.g., show only deployed assets or only those pending return).
Adding a New Asset
To add a new hardware asset:
- Click the "Create New" button [3] in the top navigation
- Select "Asset" from the dropdown menu
- Fill in the required fields: Asset Tag, Model, Status, and optionally Serial Number and Assigned To
- Click Save to add the asset to your inventory
Checking Out and Checking In
To assign an asset to a user, click the asset's name to open its detail page, then use the "Checkout" button. Select the user, location, or asset you want to assign it to, add an optional note, and confirm.
When an asset is returned, open the asset detail page and click "Checkin" to mark it as available again.
Bulk Actions
Select multiple assets using the checkboxes on the left side of the table. A bulk actions bar appears, letting you check out, check in, delete, or edit multiple assets at once.